Monday, September 30, 2013

Jane's Singer 500 Part II

I swapped motors with the 503 and the 500 quieted down somewhat.  The problem now was that the upper lid would not stay open.  The spool pins on a Rocketeer are under that top lid, so if the lid keeps slamming down on the thread spools while you're sewing, your finished product is going to be compromised - if you don't just throw the whole machine out in the back yard.

I looked at the springs that hold the lid in place and everything looked fine


UNTIL I held the 503 lid next to the 500 lid and realized that a spring on the 500 is broken.  It's such a smooth, square break that it looked like it should be that way.


I cannibalized the spring from the 503 and the lid now stays up.  I wish I could swap the whole upper plate, complete with hinged lid but the 500 and 503 top plates are not interchangeable.


I still haven't threaded it and sewn anything, maybe this evening.

UPDATE:  It Sews!


It only required some major tension cleaning and adjustment - both upper and lower.

And here's what the "Parts Machine" looks like


Sunday, September 29, 2013

Jane's Singer 500

  Last week, Jane from LuckySewandSew emailed to say she would be bringing me three vintage sewing machines on Saturday to work on.  Her car must serve double duty as an incubator because when she arrived, there were not three, but four machines in there!


  She did pretty good for a beginning vintage SM collector - a Singer 99k handcrank she picked up in Scotland, a Singer 500 Rocketeer, A Singer 503 Rocketeer and - my favorite - a Necchi Supernova Ultra. Most collectors start with Japanese clones and work their way up to the Rocketeers and Supernovas but Jane didn't waste time, she started right at the top.


  I let them sit overnight because I had some boat curtains to finish and I just couldn't decide which one to start on.  Today, with a clearer head, I put the 500 on the bench because that looked like the one needing the most work. It has two of the three most common ailments afflicting the slant-needle singers, a broken hinge on the nose door and a broken bobbin winder spring.  The third is frozen cam selectors.


 It also had a wad of electrical tape the size of a golf ball on the power cord.  Fortunately, the 503 had been designated as a part donor and it had all three of the broken parts in good condition. After swapping the foot control/power cord, door and the spring, I swapped some cosmetic pieces - the upper lid, the lamp shade and a few more.  I have it looking pretty good.


Next, I plan to swap out tension assemblies and possibly motors.  The motor runs okay but is a bit noisier than I like. I haven't yet tried sewing on it, I am letting the new oil soak in tonight and will continue tomorrow.  More to come....


Thursday, September 26, 2013

Singer 6620C

  A friend picked this machine up at a local auction.


 Before giving it to his granddaughter, he asked me to check it out and make sure it is functional.  We knew right off the bat that the bobbin case is missing but they are available new and not too expensive. In fact, I have a used one in the parts bin. The machine was making an intermittent grinding noise when running and watching the feed dog, it appears to be stuck in stretch stitch mode, regardless of the position of the selector knob. I couldn't immediately isolate the cause of stretch-stitch-only mode, so I started looking for the grinding noise. Turns out the vertical gear in the upper section has a LARGE crack and its mating gear was skipping a few teeth every time it came around to the crack.


That gear is so far down in there that much of the mechanics above it would need to be removed and reinstalled - a task I was not looking forward to. I did remove the camstack to get a better look at the cracked gear and found that the camstack gear is also cracked.


After discussing the cost of repairs with the owner, he told me to just keep it for parts or dispose of it.  I don't normally work on machines this new and there is no need for me to find a place to store parts that I will probably never use.  So, I am offering the parts to the readers of this blog.


There are lots of good plastic parts - all the panels, the slide-on bed extension, power cord, knobs.


As for internal parts, the motor seems to run fine and everything else looks good. If you want anything, email me at oldsewingmachines@gmail.com and we can work something out. I got it for free, all I have invested is time so all I will want for any parts is postage and a little to cover the cost of packing materials.  I will keep the machine until October 12 to give everyone a chance, then on the 13th, it goes to the dump.

Thursday, August 29, 2013

Useful Tool for Servicing Vintage Sewing Machines

I learned of these curve-tip syringes on an internet sewing machine forum. Folks there were using them to hold oil and grease to service their old, all-metal machines.


If you service your own machines, you know that there are places you just can't reach by ordinary means.  For instance, there is a gear under the camstack on Singer 401/403/500/503/600/603 machines that NEVER gets greased because it involves removing the camstack.


Removing is not the hard part, it's re-timing the camstack after installation that's the time-consumer. For 20 years, I have been removing the camstack, now I learn that the gear can be greased in seconds using one of these curve-tip syringes!


The tip comes with a very small hole, you just snip off a little at a time until you get the size opening for the task at hand - small hole for oil, larger hole for grease.

I got so excited, I went out and bought 50 of them!  Because, at my age, I will never wear out 50 syringes, I am packaging them in lots of four syringes and listing them in our Etsy Shop for $5.00 per package.


The shop is brand new, so at this point we are shipping only to the U.S. but might expand that later, if business is good.  I also intend to list other new and used vintage sewing machine items in the future.

Wednesday, July 31, 2013

Auction 201 Update

Progress has been slow on the 201 because we are gearing up for craft show season. I spend the majority of my spare time making wrist wallets and table runners and get very little time to tinker with sewing machines.

I learned that the bobbin winder kickout spring is broken and the bobbin winder rests on the balance wheel all the time.  I didn't have a spare spring but they are available on the internet for $4.25 plus shipping or $9.99 with free shipping.  The price was a little bit of a deterrent, since I only paid $12 for the machine, I hesitated to spend another $10 on a measly little spring but the  major issue was that I would have to wait for it to be shipped.  The spring is a very simple affair, just three coils of spring wire with a bend on one end and a 1.25" leg on the other so I surfed the internet for instructions how to make a spring.  Lowe's sells a package of four assorted sizes of spring wire for $2.98 and I picked up a pack.


. Each piece is only 6 inches long and I needed 4.5 inches for the spring, Knowing I would only get one shot, I got some fishing tackle with piano wire at Wal-Mart to make some prototypes by winding the wire around a bolt..  


  The fourth prototype fit but the piano wire is not strong enough to keep the bobbin winder suspended when the machine starts running. This evening, I made a spring using the Lowe's spring wire and it works fine.
  While unsuccessfully searching my spare parts boxes for a kickout spring, I encountered a stroke of good luck - I found a 201 terminal block!  I was already prepared to manufacture a box to contain the light switch but the switch I got at Lowe's fits just fine in the 201 terminal block.  I got this box of 201 parts about 20 years ago from a lady who had parted out some 201s and wanted to reclaim some space in her garage. That's why I hate to throw anything out, you never know when you might need it.
 

  I was pleasantly surprised when I installed a fresh needle and the machine made an almost perfect stitch on the first try.  A little tweaking of the upper and lower tensions and it now sews like a Singer 201 should. 

 When it's running, it still has a little buzz that shouldn't be there but seems to be lessening with use.  If it doesn't go away soon, I will break out my mechanic's stethoscope and track down the source.  Here's the almost-finished product.


Now that I see the photos, it appears I still need to do some more cosmetic restoration (cleaning). Honestly, it looks better in person.

Monday, July 29, 2013

Garage Find - Domestic

I bet you think I meant "Garage SALE Find" but it's not. Yesterday, I was cleaning out my garage and saw a sewing machine case behind some plywood leaning against the wall. I thought it was just an empty case but it turned out to have a Domestic sewing machine in it.


  My daughter found this machine at a thrift shop for $8 and picked it up for me as a gift.  I cleaned and oiled it when I got it but haven't used it since.  We have lived in this house for three years and it has been stored on the floor of the garage all that time but when I plugged it in, it ran as smooth and quiet as a Necchi.  With the left-needle position and having an end-loading bobbin,  I put it early in the zig zag era, probably late 1950s or early 1960s.

  I'm curious what was sewn on it previously because most of the paint is in good condition but there is a big chunk and several chunklets missing from the vertical pillar, inside the throat. What could cause that type of damage?


  I used the machine for a project last night and the only problem is that the motor does not start immediately when depressing the foot control. Thinking this might be caused by corrosion in the foot control, I opened it up and cleaned the contacts but that did not cure the problem.


  Next, I pulled off the end cover to make sure the belt was not too tight but it wasn't.  The mechanics are free moving, so it doesn't need lubrication, I guess my next move will be to pull out the motor and check for dirt on the commutator.

Tuesday, July 16, 2013

Singer 201

There is an auction held about 20 miles from here every Friday. The auction house has a website where they post photos of items in the upcoming auction. I saw this picture


and knew from the potted motor, lack of tension on the end cover, and light shade that this was a 201 and there was also a 66 Redeye in the same auction. Now, I have too many straight stitch machines but I REALLY like the 201 and I need a Redeye to install in my parlor cabinet so I headed to the auction.

I had figures in mind for both machines before I went to the auction but when I got there, I saw that the 201 was missing the terminal block


 and part of the tension assembly,


 so my mental number decreased. I should have tipped it over and seen the rust underneath but didn't want to appear too interested.  When the bidding was over, I walked away with it for the princely sum of $12.

The wires are hooked directly to a two-prong plug so as soon as the plug is energized, the light comes on and the motor runs full speed.  I don't believe anyone sewed on it that way.


Surprisingly, the motor did run and the needlebar went up and down, so I set to cleaning and lubing.  A few squirts of oil and the speed increased but the machine was quite noisy for a 201. One look at the gears told me why - they were totally dry, looked like they had never been greased.


  I spent an enormous amount of time trying to remove one of the rusted screws holding the cover over the gear set below the hook. I used liquid wrench, heat, vibration and finally ended up drilling the last screw out.

The terminal block is going to be a challenge. I have a terminal block from some machine I stripped in the past but it doesn't have the box for the light switch.  Lowe's carries a switch that looks very much like the original (although silver vice white) with enclosed wiring.


 I will need to fashion an 'L' bracket to mount under the terminal block to hold the switch.

 I didn't stay at the auction long enough to bid on the Redeye. The photo showed just a table top and the sewing head but when I got there, it included the rest of the treadle stand and cabinet - all in pieces - so I thought the price might go higher than I was willing to pay. Besides, it was going to be one of the last things to go up for bids and I didn't feel like waiting that long.

Here is one of the photos for this Friday's auction. In the early days, I would have been salivating all week but now, I think I'll skip this week unless something more interesting comes along.


Much of my collection has come from local auctions. Probably the best was a nice Pfaff 130 in a cabinet with the chair for $5! I love local auctions.

Sunday, July 14, 2013

Singer Featherweight Presser Lift Lever

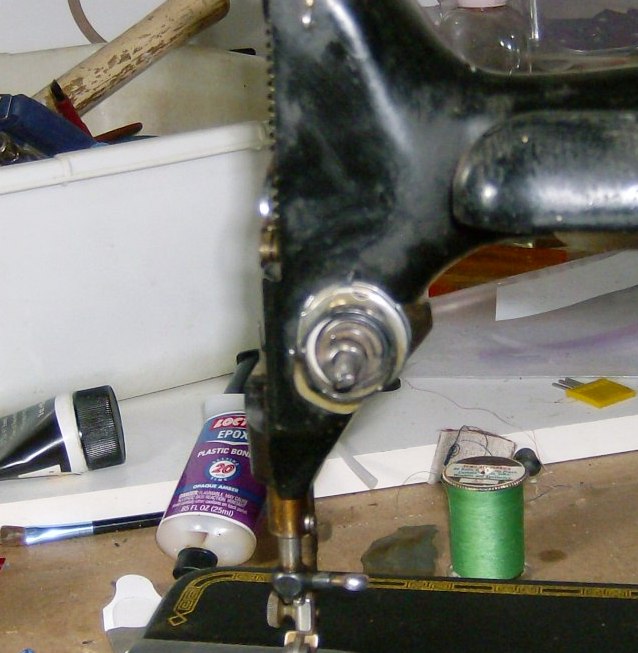
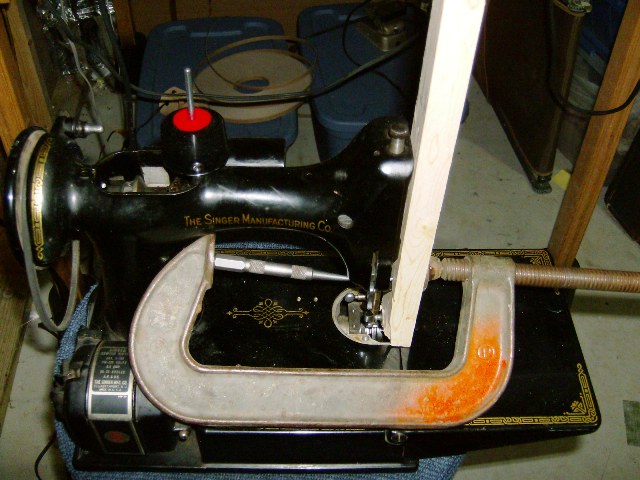
One of the Featherweights I bought off Ebay had a broken lever to lift the presser foot. Thinking this would be an easy fix, I set out to remove the old stub and cannibalize a good lever from a parts machine. I could see that the lever was held in by a pin or a screw but could not get it to move if it was a pin and could not find a slot to fit a screwdriver if it was a screw. Not wanting to damage the machine, I asked the experts on one of the vintage sewing machine forums and learned it was a pin and it had to be driven out from the back side. Easier said than done because there is no room in that minuscule throat to swing a hammer and the pin wouldn't budge from the measly little taps I was able to provide.

So, I thought, "how can I apply pressure to drive out the pin without a hammer?" My solution was a wheel puller in reverse.


Using a nail set to push the pin and a 'C' clamp to provide the pressure, I was able to push the pin out far enough to grab it with a pair of pliers and removed the broken lever.


I had intended to rob the new lever from another machine but decided to check our sewing machine parts distributor and learned that replacement levers are available without disabling another machine.


I haven't yet installed the new part but don't expect the installation to be as confusing as the removal.

Friday, July 12, 2013

Brother 220 Super Streamliner

  A friend picked this machine up at a local thrift shop. It was not out on the sales floor, it was out back being used as a doorstop. The dark pink/light purple color caught her eye immediately and she had to have it.


  She brought the machine into the shop last weekend because she had dropped it and the balance wheel turned so tightly that the motor was not strong enough to rotate it. After a quick inspection for bent rods and shafts, we noticed that the balance wheel wobbled when turned by hand. The gap between the edge of the balance wheel and the housing was about ¼ “ at its closest and about 3/8” when turned 180 degrees. This usually means that the tail of the main shaft is bent and binding on the rear bushing.


  I straightened the shaft and the machine runs as smooth and quiet as new. I purposely didn’t take photos of the shaft straightening process because I don’t want to be responsible for someone damaging their antique machine beyond repair because my directions weren't clear enough. I don’t see any youtube videos of the process, probably for the same reason. If you think you have that problem, gmail me at oldsewingmachines and I will try to talk you through it. 

Monday, July 08, 2013

Simplex


  I picked this machine up at the dump over a year ago.  The cosmetic condition and complete decals caught my eye and I tossed into my minivan. The attendant assured me that the facility has an unbeatable return policy. I plugged it in when I got home and learned that it was very noisy and did not sew. I didn't have time to fuss with it then and put it on the shelf and forgot about it. Yesterday, I pulled it out, hoping I could find it non-repairable and use its disposal to lower the size of my collection (hoard?)


The badge says Simplex Sewing Machine Company, Washington DC but tucked inconspicuously under the motor is, "Made in Occupied Japan". That places it's manufacture date between 1945 and 1952 and from some of the features, I would place it towards the end of that period.


I can't find a JA Number, but "TSM" is cast into the under side of the bed. If anyone knows what that means, please comment (Toyota Sewing Machines?) Toyota began producing 15 Class sewing machines in 1946, according to their website, so it's altogether possible that this machine was made in their factory.

Many things were wrong with this one! The only things I was surprised to find in perfect adjustment were the needlebar height and the thread gap between the shuttle driver and the shuttle. There is no shuttle cushion spring on this model, so the shuttle can become noisy fast if that gap is not correctly adjusted.

1. There is a roller in the feed dog circuit, just above the hook assembly. It was frozen and the follower was sliding, rather than rolling. 


2.  The upper tension was assembled incorrectly.
3.  The check spring was bent totally out of shape.
4.  There was so much lint packed between the rows of teeth on the feed dog that the feed dog could no longer rise high enough to feed the fabric.
5.  The feed dog height was out of adjustment (possibly because of #4 above).
6.  The feed dog was not centered in the slot.
7.  There were several loose mechanical connections and pivot points. One in the feed dog circuit made the stitch length lever vibrate when sewing.
8.  The motor was so dry, it chattered when running.

Every defect corrected just led me to another, a very fun afternoon.

I will probably never get rid of this one, no one seems to want vintage sewing machines that don't come from one of the big manufacturers - Singer, Bernina, Pfaff, Necchi, etc. but it gave me an afternoon of satisfying tinkering, I didn't have to replace any parts except the bobbin case, and I can always return it to where I got it.