Wednesday, June 21, 2006

Industrial Sewing Machines


The main difference between industrial machines and family-use machines is that industrial machines are designed to perform ONE task and perform it very well. Family-use machines are designed to do everything and as a result perform some tasks inadequately. A perfect example is buttonholes - read all the postings on various forums complaining about the poor quality of buttonholes formed on family-use machines, then look at any item of commercially produced clothing and see what the buttonholes look like. The machine that made those buttonholes will do nothing but sew buttonholes 16 hours a day, 5 days a week, but don't try to use it to install a zipper! The vast majority of industrial machines are straight stitch only because that's the kind of sewing that's performed most in factories. What you lose with the household machine is the strength, speed, and consistently perfect stitches obtained with an industrial sewing machine. In most cases, the industrial sewing machine has two distinct parts: the sewing machine itself, and the power stand, consisting of the table and motor. Most manufacturers recommend that a one-half horsepower 3450 rpm or 1750 rpm motor be used on their machines. Using this powerful motor, the machine can achieve a fast sewing speed by using pulleys. On some industrial machines you can achieve a sewing speed of 4500 spm (stitches per minute) or more. Family-use sewing machines have their motors attached to the body of the machine. The motors are usually rated at one-tenth horsepower. The power is limited because of the motor size, so they use a pulley or gearing system to increase the power while producing a slower stitch speed. Most household sewing machines sew at 800 spm.
Sometimes terms like "semi-industrial", "heavy duty", and "industrial strength" are used to imply that a household sewing machine has the power of an industrial. In these cases, the buyer should verify the actual motor power and stitching speed. That said, the Brother 1500 series and Juki 98 series are straight stitch machines possessing some of the features of home machines, like needle threaders and thread cutters. Their throats are slightly larger than standard family machines, making them popular with quilters who are unwilling to upgrade to a true industrial machine. The Bernina 950 probably has the most features on a "semi-industrial" - 21 stitches, 5-step buttonhole, and the 1/2 hp motor will drive it to form 2000 stitches per minute but throat area is no larger than a home machine. At around $1700, that would be my choice if I wanted a bunch of functions combined in one ruggedized machine. However, for the same money, I would buy a used straight stitch industrial ($250), a used zig zag industrial ($600), and one other specialty machine, depending on the sewing you do (buttonholes, grommets, quilting). As for reliability, the major brands are probably best, Pfaffs, Jukis, Brothers and the older Singers are the ones I have used.

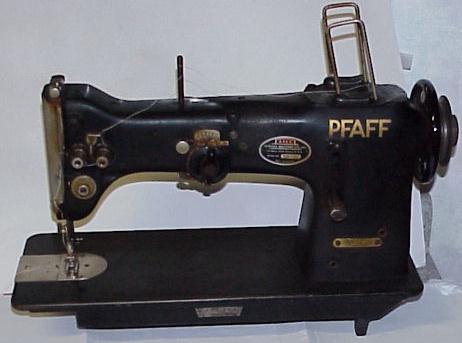
If you are looking at a used machine, check the price of any needed parts before buying. I bought a used Pfaff 144 double-needle machine that was missing the feed dog. Knowing that feed dogs for Singers cost in the neighborhood of $20, I willingly gave the $135 for the Pfaff. When I went to order a Pfaff feed dog, the dealer gave me a quote of $695 for just the feed dog! He told me I was lucky I didn't need a throat plate too, because that would add another $350! I have never owned an Adler, but hear that replacement parts for them are similarly priced.

Tuesday, May 09, 2006

Presser Feet

Mary Jo asks, "A friend has a White 999 and wants a walking foot…I've tried to explain to her about checking the alignment of the feed dogs and checking the shank, anything else she should check?". While I don't intend to use the blog to answer individual questions, this might be an opportune time to start a thread about presser feet, because they cause a good deal of stress for new users of vintage machines. I am certainly not a fountain of presser foot knowledge, I'll just spout out what I know and invite anyone else to jump in and add more info or correct any misstatements I might make.
------------------------------------------------------------------
While there are quite a number of different sizes, shapes, and styles of presser feet out there, the vast majority manufactured since the turn of the 20th Century fall into 3 1/2 categories:


- High Shank - Used on most industrial sewing machines and on Japanese zig zag machines of the 60's and 70's. Necchi machines of that era used high shank attachments on zig zag models and low shank attachments on straight-stitch models. If you have a high shank machine and are having problems locating suitable and economical presser feet, check with an industrial machine vendor. You'll be amazed at the huge variety of feet available.

- Slant Shank - Used on Singer machines made in the USA, Germany, and Japan in the 50's, 60's and 70's. Singer introduced the slant shank on the model 301 in 1950 and continued through all of the Slant-O-Matics, Touch 'n' Sew series and beyond. Interestingly, the Singers manufactured in Great Britain during the same time period continued using low shank accessories.

- Low Shank - probably the most common.

- Snap-On - I call this the 1/2 category because the snap-on adapters I have seen are low shank.
---------------------------------------------------------------------------------
Berninas use exclusive Bernina style attachments that will not interchange with anything else. This keeps the price of Bernina accessories high and is reason enough for me to stay away from Berninas unless they come with a full complement of presser feet and other attachments.

For a short time, Sears used a "Super High Shank" style presser foot on their Kenmores, probably for the same reason that Bernina uses exclusive feet - to stifle competition.

For a few years, Singer used back-clamping feet on the model 66, but later switched to low shank feet. Back-clamping feet are a bit scarce, but it is a simple job to swap the presser bar from a later model 66 and begin using low shank attachments.
---------------------------------------------------------------------------------
The general wisdom is that you may swap feet between different machines as long as they are the same style (High Shank, Slant Shank, etc.). While this is basically true, there are some considerations:

- The feed dog on a zig zag machine is wider than the feed dog on a straight stitch machine. If you try to swap a straight stitch foot to a zig zag machine, or vice-versa, the feed dog might not align properly with the underside of the foot and fabric will not feed properly.

- The needles on early zig zag machines were not centered, as they are today, they rested in the left side of the needle hole in the throat plate. If you try to swap a straight stitch foot between center-needle machines and left-needle machines, the needle will hit the foot and break. Usually the zig zag feet are still swappable because the hole in the foot is wide enough to accept the needle all the way from full left to full right throw.

The Clotilde catalog has a chart crossing machines to the style of presser foot at:
http://www.clotilde.com/cl/shank_chart1.asp
I spotted at least one error in the Necchi section, but it might help somewhat.

There you have it - the sum total of my presser foot knowledge! Comments?

Thursday, May 04, 2006

Japanese Clones of the 40's, 50's, and 60's

Shortly after W.W.II, Japan, with money from the United States, manufactured a large number of sewing machines. The most common of these were based on the Singer Model 15 but there are also Singer 99 clones. Indeed many of these machines are practically indistinguishable from a Singer and use parts that are interchangeable. Often they were given American sounding names to appeal to the overseas market. Over 5000 different "brands" have been identified, manufactured by 15 or so companies. Unfortunately, records from these manufactures don't exist, so it is impossible to identify them further. Generally speaking, a machine will, somewhere, state "made in Japan" or have "JA- " stamped into the bottom of the machine. To further complicate matters, large retailers would purchase machines and have the company name on them: RH Macy, Gimbals, etc. Any retailer so inclined could have Sewing Machines made just for him or her (Sears Kenmore, Wards Signature). I've tracked Department Stores, Machines with Automobile names, female names, patriotic names etc. The post war machines are generally well made, often quieter and smoother running than the Singers they were copied from! Japan also gave us many of our colored sewing machines. Examples have been found in metallic blue, green, pink, yellow, and I have a Fire Engine Red one! In terms of collectability, don't be fooled by a claim of "an extremely rare" Mitsubishi, Ford, Saxon, Stitch Queen etc., the same machine could have dozens of different names. If it says "Singer" on the machine, it probably is. If it doesn't, it's not. The Japanese machines have not caught on with collectors (even the ones made in Occupied Japan) and as a result retain very little value. They can be found at many thrift shops for $10-$20 and at local auctions for under $5. This might be a good niche for a collector on a limited budget – they could collect all pink machines or one machine of each color.

Tuesday, April 25, 2006

The Beginning


Collecting Antique and Vintage sewing machines is a growing hobby. Some collect just because they are beautiful to look at. The time, effort, and expense expended in decorating these mechanical marvels with gold, green, and red decals is something that is unseen in this day and age. Others collect sewing machines because they marvel at the precision mechanism and the inherent reliability. A 100-year-old sewing machine in good repair will still function today and make a straight stitch to rival the newest computer operated machines. Still others buy old sewing machines to use in day to day sewing. They may enjoy the feeling of sewing without benefit of electricity on a treadle or handcrank machine or they may just enjoy sewing for extended periods without experiencing breakdowns common to modern plastic sewing machines.
Regardless of the reason you buy old sewing machines, it helps to know how they work and how to maintain them. This is more difficult than it should be because there is very little consumer information available on old sewing machines. Instruction books can be tough to locate for many models; the handful of repair books I have found were published in the 1970s and before, are complicated and incomplete. Sewing machine dealers and repair shops have service manuals, but they guard them jealously and you will have a difficult time talking your local dealer into copying one for you. In the last couple of years, the Internet has spawned some sites where antique and vintage sewing machines are discussed and parts are swapped. If you can find those sites, you will learn more about old sewing machines there than from any other single source.
This blog is my attempt to help the antique and vintage sewing machine buyer to select and maintain an all-metal machine.