Showing posts with label Rocketeer. Show all posts

Tuesday, January 19, 2016

Singer 500a Will Not Form Zig Zag Stitch


To keep all my old sewing machines limber, I like to take them off the shelf occasionally and use them on a project.  I really should tag each machine to tell me when was the last time it was oiled and used but I’m just too lazy.  Anyway, I pulled this Rocketeer off the shelf, oiled it and tested the stitches.  I have no idea how long it had been sitting unused, maybe years.

Straight stitch was fine


but wide zig zag was not. 


I narrowed the stitch width and it got a wee bit better, but still not in the acceptable range.


My first thought was that the needle bar had been shoved up in its clamp by hitting a button or zipper but the marks on the needle bar were in the correct position so I knew that was not the cause.


The next thought was hook timing.  The point of the hook should pass just above the eye of the needle when the lower timing mark on the needle bar is at the needlebar bushing.  It was, so that was not the issue.


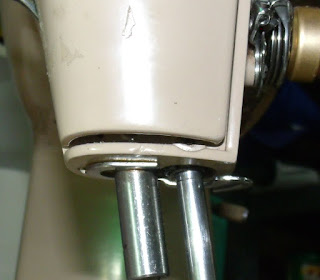
When I was watching the hook pass by the needle, I noticed that there seemed to be a more-than-usual separation between the needle and the hook point.  The service manual says that distance should be .018 inches but I measured it at .032 inches – almost twice what it should be.


To be sure that the needlebar was not bent, I installed a size 18 needle and a straight stitch needleplate and checked where the needle passed through the hole in the needleplate.  It looked just like the drawing in the service manual, so the needlebar was not bent.

The next step was to move the hook closer to the needle.  The service manual says to loosen the two setscrews indicated by "O"

And move the entire hook saddle.  It was easy enough, after loosening the two screws, the hook saddle swivels around the shaft it is mounted on and the hook point can be moved closer to or farther from the needle.  I moved the hook as close to the needle as possible without hitting it and tightened the screws.

I now still have good straight stitch and the narrow zig zag is as it should be.


I am not getting the full width zig zag that the machine is capable of, but that is a different problem that I will tackle later.

 Ed


Thursday, June 26, 2014

Singer Rocketeer Spool Pins


Anyone who has a Singer 500 or 503, aka "Rocketeer" knows of the unique spool pin arrangement.  There are no spool pins on the outside of the machine, you lift the top lid and two spool pins pop up ready for thread.


I hate this arrangement, I don't like sewing with the lid up and the pins are often slanted so the thread doesn't unwind properly.  The alternative is to plug a plastic spool pin into the hole in the lid.


When sewing on a Rocketeer, I leave the lid closed and use a thread stand. Actually, I use a thread stand most of the time because I use the large cones of thread instead of the little spools you buy at the fabric store.


We went to Lancaster, Pennsylvania a year ago and one of the fabric shops up there had a large bin of cones for $4 each.  I bought a half dozen and, when we returned this year, and I bought seven more.  I really like not running out of thread in the middle of a project. I just wish they had more neutral and light colors in the bin.


I digress - back to the spool pins. The Rocketeer spool pins are thin plastic with a couple of little pieces sticking out acting as pivot points. Needless to say, they break off often, so I picked up some to stock in the Etsy Old Sewing Machines Shop.


Replacing the pins is not difficult, you remove the upper lid and turn it over; release the spring from the broken pin,


back on the top, remove the one screw from the hold-down plate and lift out the spool pin.  Insert the new pin in the hole, reinstall the hold-down plate, and reattach the spring.


Now, if the spring is missing, stretched out, or broken, you have another problem.  While the spool pins retail for 80 cents apiece, the springs retail for $4.80 each!  This got my creative genes stirring to find a cheaper option. I got out the piano wire left over from my bobbin winder spring episode and wound a spring around a nail.


Unfortunately, the piano wire is considerably thicker than the original spring wire and the spring didn't have enough "spring".  Then, I thought that the spring looks similar to the one in a retractable ballpoint pen.  I disassembled a cheap pen, bent the ends of the spring and installed it.


Works well for now but I'm not sure if it will get stretched out or how long it will last. I will continue to look for a substitute or order some lighter spring wire.

The next problem is the spool felts that help keep the thread unwinding smoothly and prevent the spool from rattling as you sew.  The standard spool pin felts don't work because you need a slot for the pin to fold down into.

 Cutting a slot in a standard spool pin isn't the best option because the spool felt can rotate and the slot won't be where it needs to be when you lower the lid.  My parts supplier doesn't carry the 500 spool pin felts, what I do is buy a sheet of adhesive felt from the craft store, cut out a circle, punch a hole in the center,


cut a slot for the pin to fold into


and adhere the homemade felt to the lid.  Not original looking, but it does the job.


Ed
Ed's Vintage Sewing Machine Shop


Wednesday, November 20, 2013

Rocketeer #1 is Finished!


  This machine is one I thought was 100%. However, when using it, the light switch was very touchy - I had to turn the light on & off several times before it would stay illuminated. Since I was going to part out Rocketeer #3, I decided to cannibalize the light assembly for #1.

  Removing the upper lid, I noticed that the bobbin winder return spring and the bobbin winder latch spring were both not working properly. So much for 100%!

  I posted a few days ago how to replace the bobbin winder return spring and I just had to bend the end of the latch spring and reattach it to the latch to remedy those issues.

  I should have made a tutorial on how to replace the light assembly, it turned out to be a bit more complicated than I had envisioned but I didn't take any photos so it would not be too informative.


The easy way is to cut the wires just inside the machine housing and splice the new socket to the existing wiring but I elected to do it the hard way and replaced the socket and wiring as a single unit, threading the wire down to the main connector.

  When I reassembled the 500, I found that it would zig, but not zag.  At full zig zag width, the needle would go full left and come back to center, but not go from center to the right.  Slant-needle Singers only have a paltry 4 mm zig zag to begin with and cutting that in half leaves that function essentially useless.

  I oiled everything I could get at several times, let it sit, ran it at high speed to work in the oil, but nothing helped.  I could manually push the needle to the right, but it would not go there under its own power.

  I spent much of Sunday afternoon and most of Veteran's Day fiddling with that one problem. The service manual was no help, but the diagrams did convince me that the cause was either a binding needle bar vibrating bracket or a binding needle bar driving arm.

  The needle bar vibrating bracket was the most easily accessed, so I tackled it first.  I loosened the collar below the bracket that holds the bracket in place to be sure that the binding was not at this point.  


Of course, being the easiest fix, that was not the problem.

  The needle bar driving arm is an I-beam connected to the needle bar vibrating bracket one end and a forked end connected to the stitch selector. At the end of the lower fork is a thing called a "ball pivot".  From what I can tell, it looks like a metal Tootsie Pop with a round globe on one end and a shaft on the other end that hooks to the bottom fork of the needle bar driving arm.


  The "ball" of the ball pivot sits in a tunnel in the side of the stitch selector and keeps the driving arm aligned.  The ball slides back and forth in the tunnel as the driving arm moves left and right to re-position the needle.
  I had oiled the back side of the ball pivot several times but the oil had apparently not penetrated far enough into the tunnel to lubricate the ball and make it slide freely. To get at the front side of the ball, you need to remove the camstack. Once the camstack is out, the tunnel is visible on the left wall of the stitch selector.


  I tipped the machine on its nose and filled that tunnel with sewing machine oil and let it sit for an hour. When I next tested the machine, the zig zag was still at 2mm.  I put pressure on the needle bar driving arm to encourage it to move the needle to the right and after a minute of running the machine and adding pressure, the zig zag opened up to its full 4mm.


  That was about 7:30 last night and I am glad I didn't have to go to bed with that on my mind.


Tuesday, November 12, 2013

Rocketeer Bobbin Winder Latch Spring

  As I was reassembling the bobbin winders on my three 500's and the 503, I noticed that on only one of the four machines did the bobbin winder latch remain snug against the bobbin winder. It was a little difficult to see why, but investigation revealed that there is a spring under the bobbin winder latch that is supposed to push the bobbin winder latch up against the bobbin winder.


That spring is hard to see because it is so small and hidden under the latch.  I see only two functions for this spring:

 - It keeps the bobbin winder latch from rattling during machine operation

 - It makes the latch snap into place if the operator engages the bobbin winder by pushing the bobbin winder toward the balance wheel but the instruction manual says to engage the bobbin winder by pushing the latch
toward the bobbin and not by pushing the bobbin winder itself.

  Fortunately, I cannot see any adverse effect on machine  performance but if the designers felt it should be there, I want to restore it to original condition.


   The spring is a simple affair having about 1 1/2 coils with an "L" bend at each end. one "L" hooks on a finger beneath and behind  the latch and the other hooks over the back side of the latch.


 The spring  is not as heavy as the bobbin winder return spring and the music wire fishing tackle I bought previously was  close in diameter, so I was going to fashion new springs from it.

  The good news is that none of the springs was broken, they had merely slipped out of place.  Problem as I see it is that the "L" that hooks over the latch is not long enough and eventually loses its grip on the latch.


  A very simple solution - take a pair of needlenose pliers and bend that "L" into a "U".  That should hold in place better than the original design.


Check your Rocketeer bobbin winders to see if there is any spring to the latch when you push it away from the bobbin winder shaft. Since 3 out of 4 of my machines did not offer any resistance, I have to deduce that this must be a common deficiency with this particular design.

NOTE: If you remove the latch, don't lose the washer underneath or the latch will not be able to swivel when reinstalled.


Saturday, November 09, 2013

Singer Rocketeer Bobbin Winder Spring

One of the weak points of the Singer 500a and 503a is the bobbin winder spring.  The spring breaks and the bobbin winder will no longer spring back when the bobbin is filled.  Sometimes, the bobbin winder won't even latch to fill a bobbin.

Fortunately, I had a good spring to use as an example, so I wasn't "flying blind".


Measurements are quite simple and only one is critical - the straight arm of the spring is 3/4" long; the L-shaped arm has a 3/4" long extension, then bends down at a 90-degree angle for another 3/4".  There is only one coil.

For the price of one ready-made spring on the internet, I purchased a 446-foot coil of .029" diameter spring wire. I think I will have enough wire to fashion my own springs for several lifetimes.


I cut off about a foot of wire so that I would have enough to grab onto and wound it around a bolt.  I like to use a bolt because the threads help keep the coils even and straight.


 Then, I cut one arm off at 3/4" and the other at 1 1/2".  I put a 90-degree bend in the long arm and was ready to install.

Unfortunately, I made the coil too small.  This is when I learned that the critical measurement is the coil section - it has to be approximately 1/2" in diameter.


 Larger diameter might work, but I made the first spring with a smaller coil and the bobbin winder mounting screw tightened against the spring and would not allow the bobbin winder to swivel.  It seems counter-intuitive to me, but the coil of the spring must be large enough to remain outside the bobbin winder's swivel arm.


Several more prototypes with unsatisfactory coils.


I finally found a dowel that allowed me to make the correct 1/2" coil and got a good copy of the sample spring.


 If I were going to make many more, I would pick up a larger diameter bolt to wrap the wire around but I only need two right now, so the dowel will suffice.

Wednesday, November 06, 2013

Slant Needle Nose Door Hinge Repair


I estimate that half the slant needle Singers I find in the wild have a broken upper hinge on the nose door.  This is especially true of the 500 series (500a & 503a) but I have also seen it on 401's and 600's. Many of these doors are held on with clear packing tape and that's a band-aid fix but I prefer to have my machines LOOK nice, even if they have been repaired.


So, here is the nose door from the 503 I am rebuilding.  It has the common feature of half the upper hinge broken off and missing, so it cannot just be glued back.  With the broken piece went the hinge pin, so we also have to find a replacement pin. I normally use a finish nail, but this is the shaft out of a pop rivet.


I mix up some epoxy and fill what's left of the channel for the pin.


Next, I position the replacement pin so that it is at the correct angle and press it into the epoxy.  It is best to balance the pin in the slot so that it does not slump down before the epoxy hardens. Then, I slather epoxy over the pin to help hold it in place.


24 hours later, I slice off the excess epoxy and excess pin from the top of the hinge.  I use a rotary tool with a cutoff wheel.  If I applied too much epoxy, now is the time to grind or file it down so it doesn't interfere with the opening or closing of the door.


The original pin is about 1/4" long, but you will find it easier to install the door if you leave the replacement pin a bit longer. With both upper an lower pins the same length, you have to align both with their respective holes to install the door.  If you leave the upper pin longer, you can insert the upper pin and the extra length holds the upper hinge in place while you fiddle with the lower hinge pin.


 TA-DA! the 503 now has a functioning nose door.